Prepare for CAEYC with DIY Fun!

16of16

We are gearing up for CAEYC, which is also known as the California Association of the Education of Young Children!  This association has an annual convention in California for early childhood educators.  Each state has their own association and there is a popular national association called NAEYC (the National Association for the Education of Young Children) This national association is the premier professional development conference for teachers who work with young children; ages 0-8.

I am sponsored by Discount School Supply which is a nationally recognized company that supplies quality school products at everyday low prices.  Each year they have a booth at the CAEYC and NAEYC convention and each year I attend and present at workshop.  At CAEYC 2016, Discount School Supply will a proud supporter of the association and has gotten “Super Star” Status through their contributions to this wonderful organization!

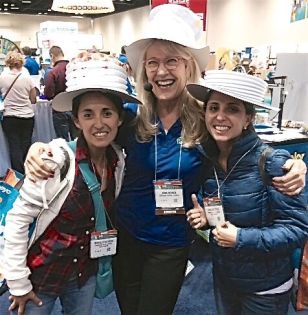
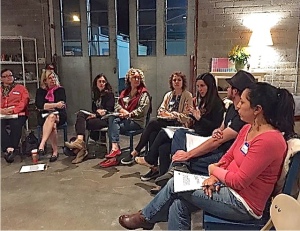
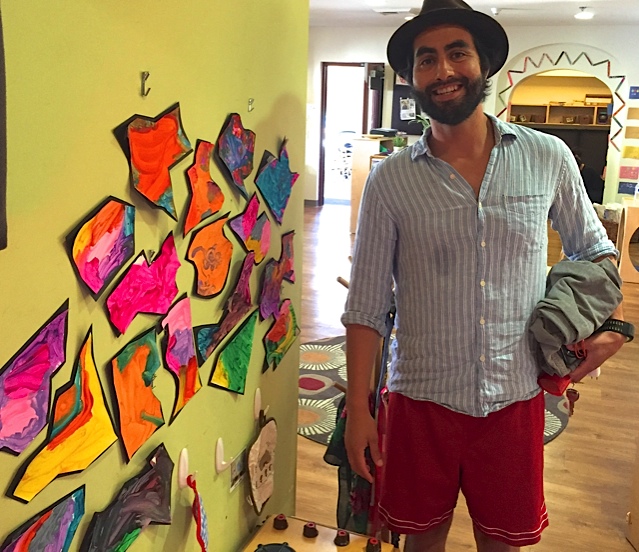
These conferences are so much fun! I just love to engage with all of the fellow educators that attend. Check out the PARTY at the NAEYC 2015 booth that Discount School Supply sponsored! We pulled out all the stops and engaged teachers in more hands-on creativity than ever before this year. Our goal in the DSS booth area was to provide creativity and rejuvenation, and from the looks of it we were successful. Yay! The paper Top Hats we’re wearing are fun to decorate and super easy to make with our Top Hat Lesson Plan.

1of16

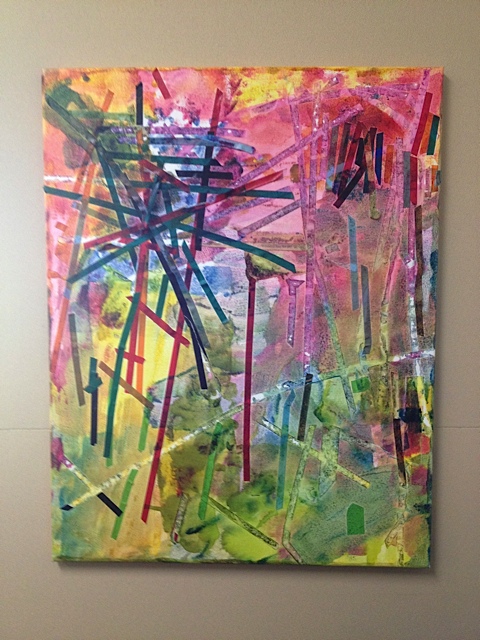
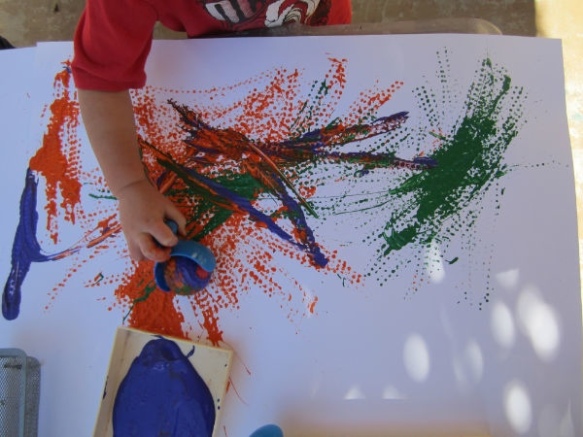
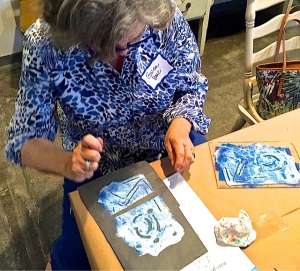
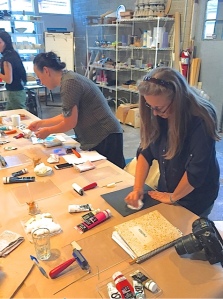
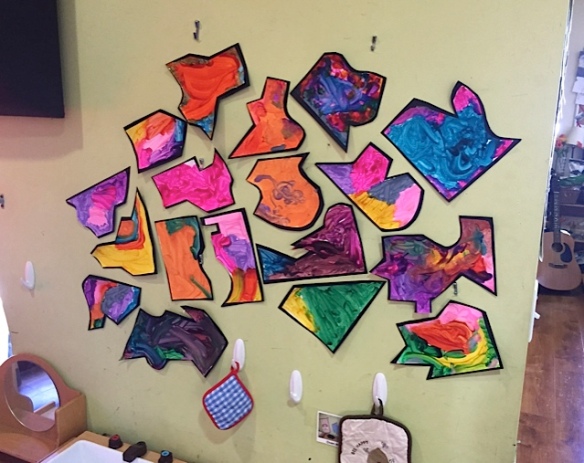
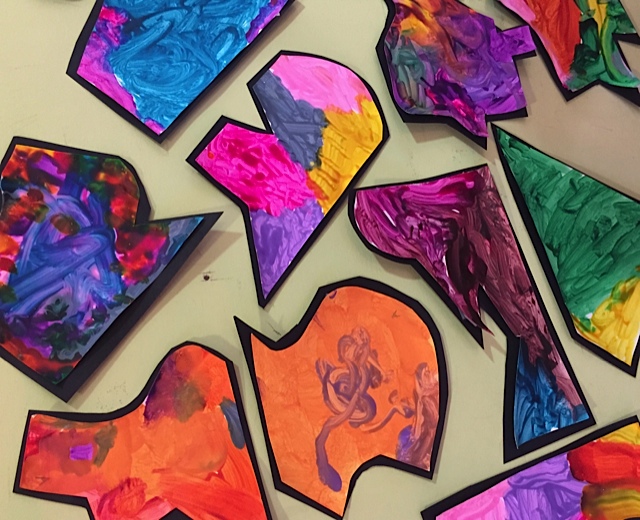
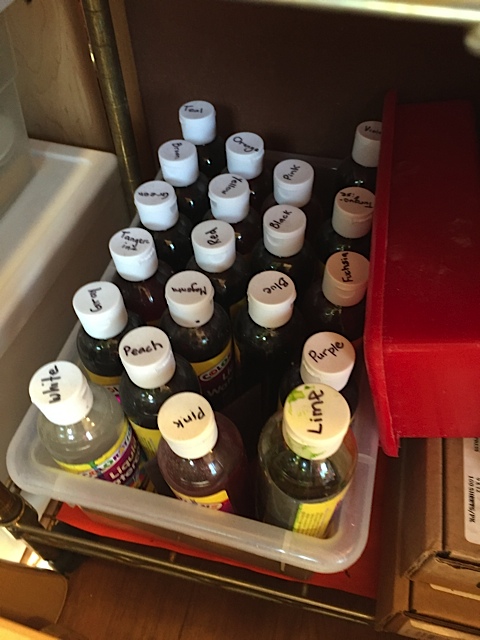
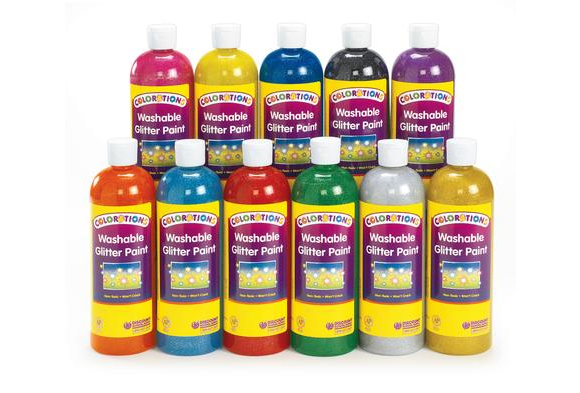
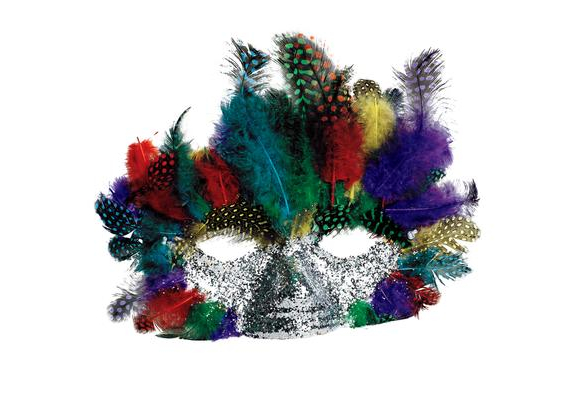
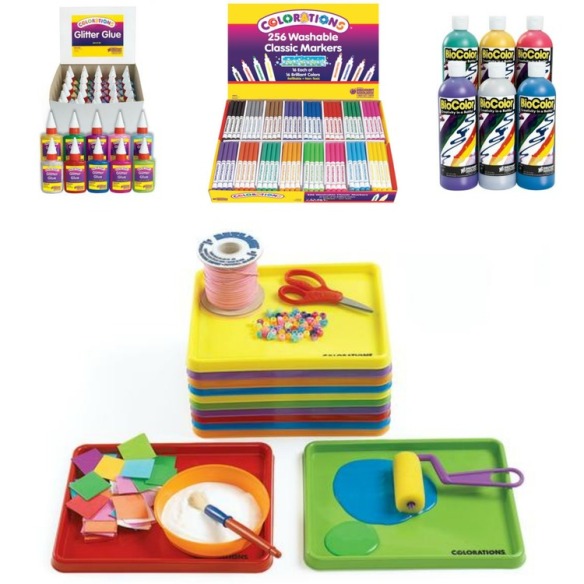
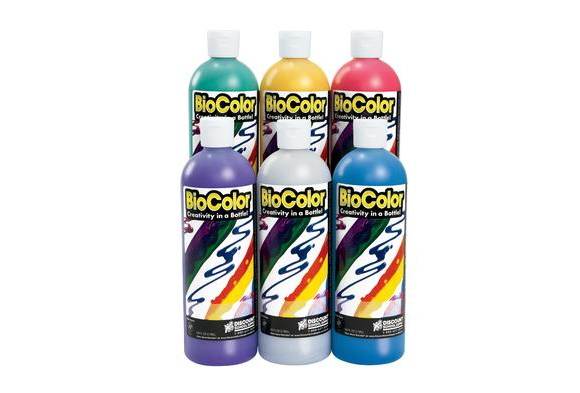
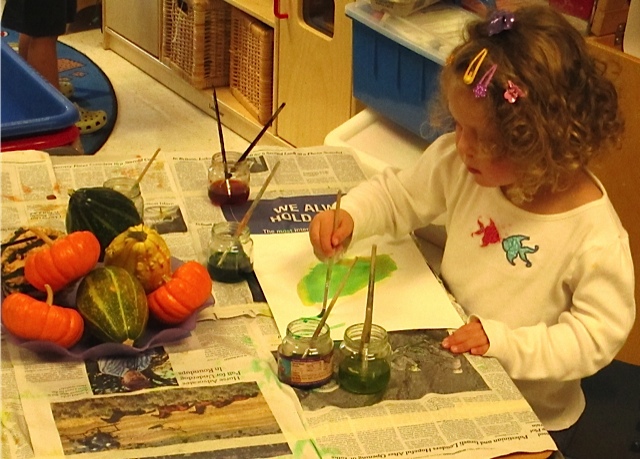
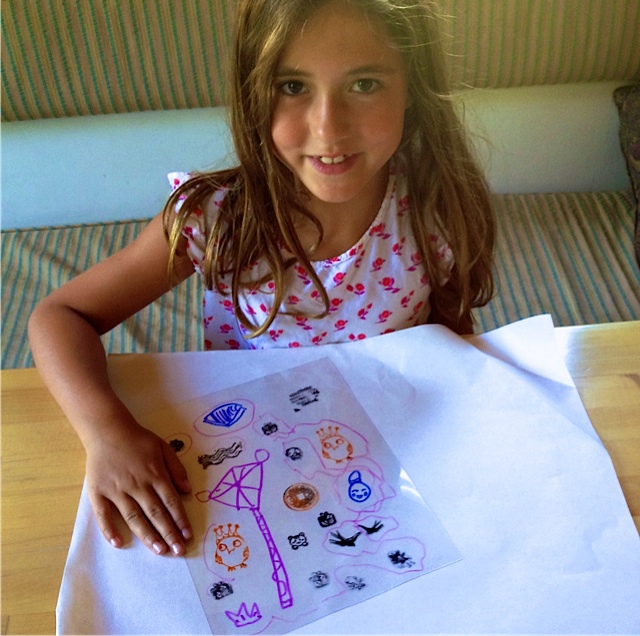
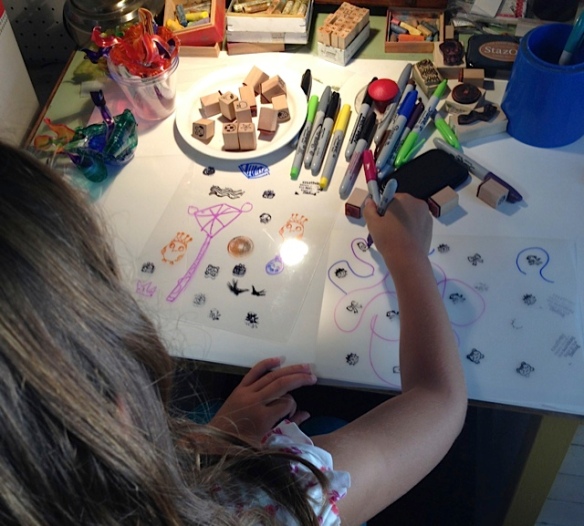
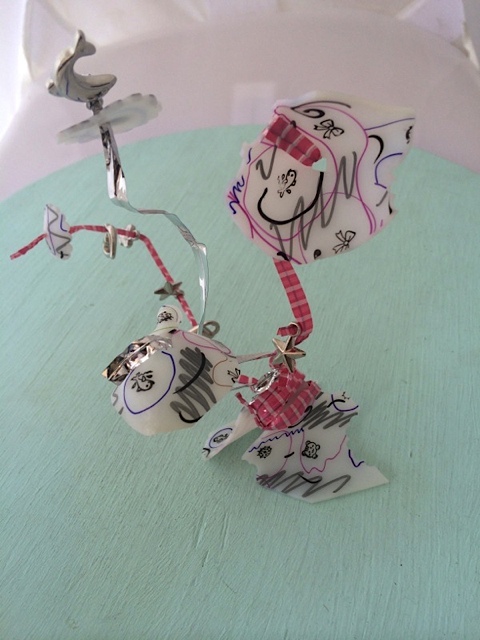
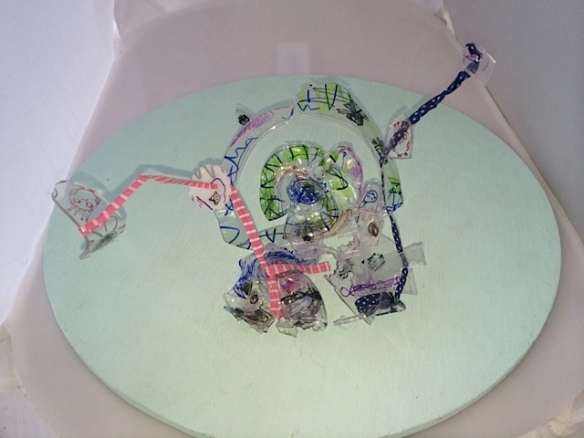
Since hands-on discovery is the way we all learn best, we organize DIY experiences by offering a variety of arts materials with just a wee bit of structure and guidance. At NAEYC we highlighted BioColor® one day, and Colorations® Liquid Watercolor another day while providing how-to tips and ideas for both beginners and more seasoned staff. Teachers could sit down and play with our paints and a variety of new collage materials while combining fresh techniques in new ways onto a final craft project.

7of16

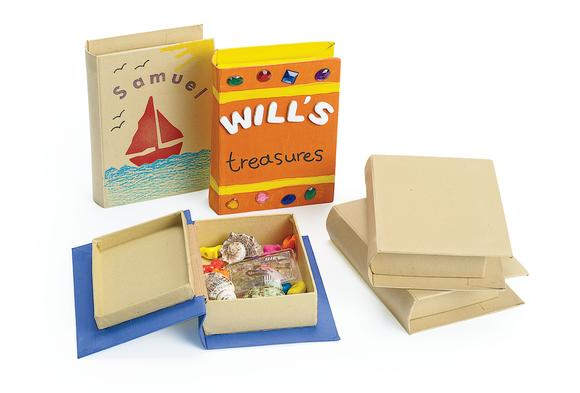
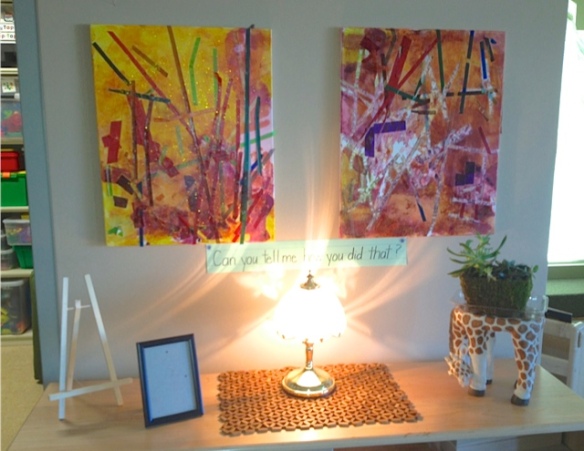
Here’s a favorite open-ended project: our papier-mâché Secret Boxes. These make wonderful handmade gifts and if you like these teacher-oriented clip art quotes, they are provided here for your use. These quotes are perfect for mixed media creations, and can turn any teacher’s Party into a creative DIY event.
15of16

Won’t you join us at CAEYC or your state conference this year? We’ll bring the party!

Materials Shown in this Post:     
Paints & Collage Materials  
BioColor Painters BMAR
Glittering Rhinestones Gem Jar GEMJAR
Iridescent Fabric Shapes SHINYFAB
Spotted Feathers SPOTTED
Printed Craft Tape FABULOUS
Projects To Decorate  
Paper Mache Secret Books PMSEC
White Paper Top Hats HATSOFF


WorkShop at CAEYC 2016 by Anna Reyner

Art, Creativity and Brain Development

Apr 1, 2016 @ 02:00 PM

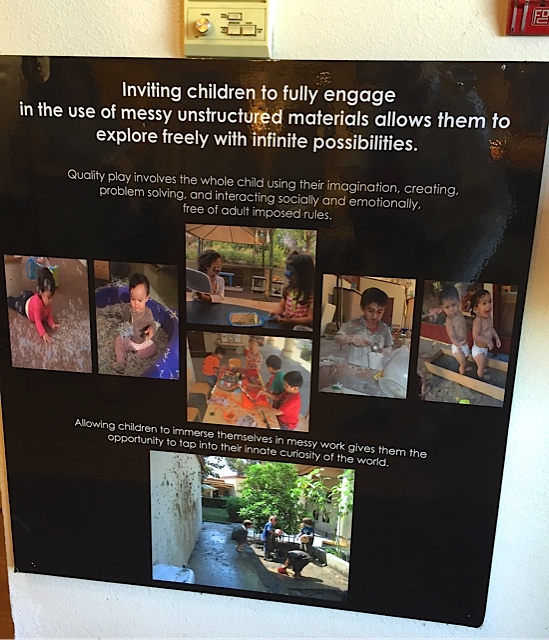
Modern neuroscience has provided hard evidence that connective pathways in the brain are actually created by repeated early experiences. A child’s early engagement in art activities can help create unique brain connections that will have long-term impact on a child’s life.

Art engages children’s hands, minds and emotions and helps develop valuable cognitive, social-emotional, and multi-sensory skills. Learn to identify the many developmental skills children master through art activities, and how self directed art fosters creativity and self esteem.

“Art & Brain Development”
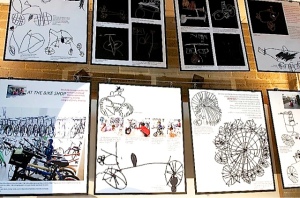
Repeated experiences with open ended art builds nerve circuits in the brain that influence how a child does in school, in relationships, and in society as a whole. A developmental theory presentation will discuss how art activities facilitate intellectual growth and cognitive development in early childhood. A Power Point presentation on Art in Child Development includes 20 slides of children’s artwork. Participants will review these slides and discuss how each different art activity facilitates specific problem solving, decision making and other cognitive skills.

“Art Therapy: Tools & Techniques for the Classroom”
Participants will be introduced to basic principles of art therapy and simple guidelines for understanding the language of children’s art. Through better understanding the language of art, participants will be better equipped to understand the emotional needs of the children in their care.

Session concludes with a playful hands-on art experience where participants engage with a partner and make their own art.

Discover the Pedagogical Institute in Santa Monica!

cover

“I love this!” exclaimed Gwen Dophna, a professor of Child Development, as we learned and played together last week. I was having fun too, learning Monoprint Techniques at the exciting new facility for early childhood educators called The Pedagogical Institute in Santa Monica, California.

1

Have you heard about this place?  It’s a true THINK TANK environment – and if you’re an early childhood professional, you owe it to yourself to check them out. Let me give you a taste of my experience….

3

4

Last week’s Monoprint class was skillfully taught by Alexis Afaghi, a full time Atelerista at the nearby Evergreen School. We were a small but eager group of ECE professionals, learning open-ended art techniques and experiencing the unique combination of stimulation and camaraderie that is a part of every event or gathering at the Pedagogical Institute.

Alexis began the class with a brief introduction to Monoprinting, the art of printing a singular piece of art from one printing plate. Alexis taught us using small plastic printing plates which she had acquired for free from a nearby plastics shop (yay, teacher donations.)

5

6 7

We rolled paint with brayers onto plastic printing plates, and then removed some of the paint with cotton balls, Q-Tips, and small makeup sponges to create lines and shapes in the wet paint. Then we pressed paper onto the top and pulled it off to reveal our MONOPRINT – a fresh and original work of art.  Tah dah…..

8

Marsha seemed pleased with her artwork, which was gratifying since she had driven two hours to get to the Institute workshop! We traded stories about our careers in Child Development as we worked on our art, and I felt connected in a very satisfying way. It was truly an exercise in self-care to be there that evening. Teachers and directors and professors often work in isolation, and this place is a sanctuary to relieve stress.

9

10

1112

The Pedagogical Institute had its Grand Opening about a year ago, on Sept 21, 2014. Their calendar is full of exciting, thought provoking events. They offer many fascinating workshops besides art – as well as Book Study and Discussion Groups on topics such as Boys & The Media, Building Democratic Schools & Communities, and Talking about Death with Children. They also offer museum quality installations and Documentation labs, as well as mentoring opportunities, an annual conference, and renowned guest speakers.  How can you NOT take advantage of this resource? It is in a class of it’s own.

Join them on Facebook and explore their website to learn more:

https://www.facebook.com/PIofLA

www.thinkwithus.org

13

14

15

A Thousand Cranes & Other Collaborative Art

anna crane 1

This week I had the good fortune to visit Anna Bing Arnold Children’s Center at Cal State L.A., where creative ideas are thriving. Curriculum Coordinator Alexandra Walsh and Director Patricia Ulloa have decades of combined experience and a particularly innovative staff. Like Dominic, who facilitated this brilliant collaborative puzzle piece painting with three- and four-year-olds, which immediately caught my eye. Isn’t it brilliant?

anna crane 2 anna crane 3Dominic explained how this experimental project began by cutting 12 x 18” Real Watercolor Paper into puzzle shapes, then prompting children to select a shape and paint it using Colorations® Simply Washable Fluorescent Tempera. The puzzle pieces were placed in a basket in the art area for use at any time. The intense color you see here resulted from distinct 3 variables:  (1) using fluorescent paint,  (2) mounting each puzzle piece painting onto black construction paper, then trimming a close border, and (3) by using watercolor paper instead of white construction paper. The added thickness (and spongy quality) of watercolor paper absorbs more pigment than regular paper, giving the finished paintings a visual “pop.”   Nice!

anna crane 4 anna crane 5 anna crane 6 anna crane 7

I fell in love with this Thousand Cranes Origami project, facilitated by Jasmine Cruz and Raul Delgado, which creates a unique environment that children, parents and teachers all participated in!  This delightful classroom activity, which combines open-ended art with math foundations and collaborative teamwork, embodies the “Four C’s” which children will later address in Kindergarten and elementary school.  These “Four C’s” are the four specific skills deemed by the US Dept of Education to be the most important for preparing students to succeed in the 21st century: critical thinking, communication, collaboration, and creativity.  Kudos to Jasmine and Raul for initiating an important learning experience while adding beauty and innovation to their school.

anna crane 8A Thousand Origami Cranes is a group of one thousand origami paper cranes held together by strings. An ancient Japanese legend promises that anyone who folds a thousand origami cranes will be granted a wish by a crane. Some stories believe you are granted eternal good luck. The crane in Japan is one of the mystical or holy creatures that is said to live for a thousand years: That is why 1,000 cranes are made, one for each year. Here children decorated papers over the course of two months, while parents and staff folded them into a thousand origami cranes. Thanks to patience and motivation, the children’s parents, grandparents and teachers strung all thousand of their hand-colored paper cranes onto cord and even added pony beads for charm.

Creative art programs like this one develop over time as the result of intention and practice on the part of administration and teachers. Lots of little tips that facilitate art set-ups are learned from experience. Writing the paint color of each bottle on the top of the white lid makes identifying each bottle a breeze.  Glue doesn’t just stick things together. It can be used in unique ways and one way is to pour a thick layer of clear glue onto a smooth surface and add seed pods, ferns and natural collage elements. When the thick layer of glue eventually dries, it creates a unique semi-clear glaze which holds the collage elements together. This second collage also uses clear glue, but in this one the glue is first infused with Colorations® Liquid Watercolor, then is painted and drizzled onto butcher paper.

anna crane 9 anna crane 10 anna crane 11anna crane 12Last but not least I re-discovered one of my favorite art techniques at Anna Bing Arnold that day:  the wonderful effect of colored chalk on black paper. This black butcher paper mural has so much energy, and I love how the door handle was cut out!  It also beautifully illustrates the constructionist idea on the poster in the center’s lobby: “Inviting children to fully engage in the use of messy, unstructured materials allows them to explore freely with infinite possibilities.”anna crane 13Thank you, Alex and staff for a LOT of inspiration.  Which one do YOU want to try?  

Materials Used Here:
Colorations® Liquid Watercolor Paints, 8 oz. – Set of 18 (LW18)

Colorations® Washable Clear Glue (P4GL)

Butcher Paper Rolls (P4018)

36″ x 1000′ Dual Surface Rolls, 40 lb., black (PDSBK)

Colorations® Colored Dustless Chalk – 100 pieces (CNODUST)

12 x 18″ Real Watercolor Paper – 50 sheets (BIGMONET)

9×12″ Heavyweight Construction Paper – 50 sheets (9CPBK)

Colorations® Simply Washable Fluorescent Tempera – set of 7 (FSWTSET)

Pony Beads – 1 lb. (PONY)

* Brought to you by Discount School Supply®

* For more ideas, visit Art and Creativity in Early Childhood Education.

Vision Boards & the Art of Collage

Anna Vision Board 1

Have you heard about vision boards? A vision board is a visualization tool that you can use as inspiration toward your ideal life. Some people refer to it as a “dream board” or an “inspiration board.”

Vision boards are a great way to have fun with simple art supplies and set your sights on positive goals. January is a perfect month to set positive intentions for your work and your life. Would you like to explore the simple art of collage and consider making a vision board yourself?

Anna Vision Board 2

This weekend I invited a few girlfriends over to create 2015 vision boards. We had so much fun! Everyone brought a few magazines and with basic art supplies and poster board, we created “mandala” style vision boards. Classic vision boards are created on standard sized poster board, but I prefer the finished look of a circle – it’s much more visually pleasing. You can take any standard-sized poster board and make a circle out of it by tracing a large circle onto it (we used a trash can lid here) and cutting it out before you begin your collage.

Anna Vision Board 3

Lately I’ve been delivering “Renew Your Passion” workshops at conferences to help teachers de-stress and reconnect with their sense of joy and purpose. Collage is a great way to revitalize your spirit because it’s easy and fun and lends itself to a focus on personal values and goals. In these examples from a recent workshop, we collaged quotes, pictures and value words onto papier-maché secret boxes. Then we added tissue paper squares, Colorations® Washable Glitter Paint, and spotted feathers. They are inspirational and so EASY to make.

Anna Vision Board 4 Anna Vision Board 5 Anna Vision Board 6

Children love to collage with tissue paper and magazine cut outs, and you can adapt these same ideas for your classroom. Here’s a good classroom collage set up from the education department of a children’s museum, where children have cut out and sorted magazine photos by color. Then they created individual color wheels from the assortment. How clever is that?

Anna Vision Board 7 Anna Vision Board 8

Here’s a Vocabulary Collage lesson plan that you can download {just click here!}.

Scribbles, the new Colorations® parrot, introduces this and other creative art lessons on our website for 2015. Welcome, Scribbles! We do agree with Scribbles, “Art really is a colorful way to learn!”

colorations_new_landing3

Materials used:

Economy Weight White Poster Board – 50 sheets

EWB

Colorations® Washable Glitter Paint – set of 11

GLPA

Spotted Feathers – 1 ounce

SPOT

Secret Boxes – set of 12

PMSEC

Colorations® Washable Premium Glue Sticks – set of 30

PRESML

* Brought to you by Discount School Supply®

* For more ideas, visit Art and Creativity in Early Childhood Education.

Top 10 Teachers’ Gifts for the Holidays

The winter holidays get started earlier and earlier these days, and a huge Christmas tree just went up at our local mall, oh my!  Why am I still surprised that holiday seasons seem to have expanded?  I suppose with all the stress of modern living, I might consider it a good thing to stretch out any celebration of positive values and community.  So I’m planning ahead for my own holidays and just purchased a few craft supplies to make some handmade gifts.  I figure one way I can avoid succumbing to the mass materialization of the season, is to continue to promote art and creativity in what I purchase and give away.

Would you like to join me, and promote art and creativity in YOUR classrooms this season?  I just looked though our entire Arts & Crafts Section page by page (that’s 130 pages, a lot of cool stuff) and selected ten things I am sure ANY early childhood teacher would adore.  After all, when children are young, art is the easiest entry portal to ALL learning – and the best way to have FUN as you learn.

Here they are, not in any particular order because they are ALL something special:

MARCRAY – Colorations Markers & Crayons

MARCRAY – Colorations Markers & Crayons

98256 –Colorations Washable Classic Markers Classroom Pack

98256 –Colorations Washable Classic Markers Classroom Pack

GGCLASS – Colorations Glitter Glue Classroom Pack

GGCLASS – Colorations Glitter Glue Classroom Pack

MTRAY - Colorations Mini Art Trays – set of 12

MTRAY – Colorations Mini Art Trays – set of 12

MBIOSET – BioColor Metallics set of 6

MBIOSET – BioColor Metallics set of 6

FSWTSET – Colorations Simply Washable Fluorescent Tempera

FSWTSET – Colorations Simply Washable Fluorescent Tempera

CLRTRI – Colorations Triangular Crayon Classpack, set of 200

CLRTRI – Colorations Triangular Crayon Classpack, set of 200

CPPENCIL – Colorations Colored Pencils set of 240

CPPENCIL – Colorations Colored Pencils set of 240

STAMP – Colorations Jumbo Stamp Pad Classroom Kit

STAMP – Colorations Jumbo Stamp Pad Classroom Kit

COLORKIT – Colorations Colorful Collage Kit

COLORKIT – Colorations Colorful Collage Kit

I still remember when I was a teacher and the challenge of gift giving presented itself.  Before winter break, many of my students and their families gave me loving keepsakes as tokens of their affection, when what I really wished for was something special for my classroom – something that would make everyday learning more fun for me AND for my students.

I hope my list of favorites helps ease your gift giving decisions, and that you’ll join me in celebrating your own creativity this season.  Have fun, and go make something!

What’s on your holiday wish list for the classroom?

Fall Art Ideas for Young Children

Anna Fall Art 2014 1

Fall is here, the leaves are starting to turn and the air is becoming crisper. Hooray! It’s time for the scents and smells of autumn. Here are some fun ways to bring autumn themes into YOUR home or classroom.

Small gourds and Indian corn make great additions to your sensory bin and inspire children to observe, compare and explore nature and its many attributes. This sensory bin promotes STEM learning foundations, as does the observational painting that you can introduce with the same gourds.

Anna Fall Art 2014 2

This 3-year-old is painting with Colorations® Liquid Watercolor™ as she observes and documents a gourd. Observational drawing and painting is an important way to facilitate critical thinking and brain development in early childhood. Drawing and painting from nature can also slow children down, reduce stress and promote self- regulation. These are important skills for children to learn that go way beyond the more obvious benefits of art-making.

Anna Fall Art 2014 3

Anna Fall Art 2014 4

Anna Fall Art 2014 5

Leaf Punching is a great way to incorporate nature into your fall art activities. Use large hole punches that are easy for young hands to manipulate and punch shapes out of leaves that are at various stages of drying out. You can also let colored leaves dry out completely and crunch them into “leaf glitter” to use in collage work.

Anna Fall Art 2014 6

Anna Fall Art 2014 7

Anna Fall Art 2014 8

Tree bark makes a good natural painting surface. Look for fallen bark pieces on a nature walk this time of year. These chunks of eucalyptus bark made for wonderful paintings by 2- and 3-year-olds. Painting on bark calls for an opaque paint, like acrylic paint.

Anna Fall Art 2014 9 Anna Fall Art 2014 10 Anna Fall Art 2014 11

Don’t forget how much fun it can be to add Colorations® Liquid Watercolor™ to soil and paint with it. This Writing Center incorporates color-tinted soils to Twig Books, a variation of the Paper Bag Book lesson plan from Smart Art Ideas.

Thanks for checking in and have a wonderful autumn.

Materials Used:
Colorations® Liquid Watercolor™, 8 oz – Set of 18 (LW18)

Colorations® Acrylic Paints, 8 oz – Set of 8 (CACRYLIC)

Giant Paper Punches – Set of 8 (BIGPUNCH)

* Brought to you by Discount School Supply®

* For more ideas, visit Art and Creativity in Early Childhood Education

STEM to STEAM: Shrink Art Sculpture, Dale Chihuly Style

Anna Chihuly Shrink Art LeadHow do you encourage and preserve children’s natural creativity and belief in their own capacity?

This week I had an “Artist Play Date” with 7 year old Nora, who taught me the shrink art techniques she learned at summer camp. Nora knows I am a big fan of Shrink-It-Sheets, so she was eager to show me her innovative and truly unique creations.

Anna Chihuly Shrink Art 2Anna Chihuly Shrink Art 3

Nora had learned how to use clear shrink art plastic to make 3-D art abstractions in the style of glass sculptor, Dale Chihuly. Here’s Nora in my garage studio with some of the clear shrink-it sheets that she decorated with permanent markers and rubber stamps.

I love the combination of art, math and science that shrink art projects provide. It engages scientific inquiry, physical science and geometry, and includes active explorations of cause and effect, change of state, and mathematical reasoning. Not to mention that it’s colorful, creative and fun.

Anna Chihuly Shrink Art 4Anna Chihuly Shrink Art 5Anna Chihuly Shrink Art 6The artist we were emulating is Dale Chihuly, a glass art sculptor known for his stunning and colorful organic shapes. Unlike the majority of glass artists whose work is functional and focuses on vessels and bowls, Chihuly’s glass work is pure abstract art. Children typically relate very well to his use of bright colors and shapes, and can easily be inspired by his style. People traveling to Las Vegas can see this stunning example of his work in the lobby of the Bellagio Hotel.

Anna Chihuly Shrink Art 7Anna Chihuly Shrink Art 8A close look at Nora’s shrink art sculpture shows off the same brilliant colors and organic shapes of Chihuly’s style, and this close up blue “pod” created from opaque shrink art plastic also reveals rich semi-transparent colors.

Anna Chihuly Shrink Art 9Anna Chihuly Shrink Art 10

Here’s another example of opaque Shrink It Sheet cutouts, which we decorated with markers and rubber stamp impressions. They’re shown here in the oven, where we baked them for 3 minutes at 310 degrees. When they came out, Nora attached them together into this small sculpture using Twist and Bend Craft Ties. You can also a hot glue gun to attach baked pieces together, but twist ties add color and eliminate the stress of using hot glue.

Anna Chihuly Shrink Art 11Anna Chihuly Shrink Art 12While the oven was warm, we also experimented with permanent markers and stamps on plastic cups. Here are the cups before and after baking. Again, Nora used Twist and Bend Craft Ties to connect baked parts together into one composition.

Just like with the Shrink-It-Sheets, we baked the colored plastic cups for 3 minutes in a 310-degree oven. Various brands of plastic cups have different properties, and oven temperatures also vary, so this part calls for experimentation (aka the scientific method at work). You can use a toaster oven in the classroom too, just keep the windows open for ventilation. It’s so dramatic to see how oven heat distorts, shrinks and flattens various thin plastics, causing designs to shrink and colors to intensify.

Anna Chihuly Shrink Art 13

Thanks, Nora! I learned a lot from you and admire your curiosity. And while I’m kind of sad that summer break is coming to an end, I know a new school year of growth and discovery lies ahead for YOU and other children nationwide.

With the nationwide emphasis on STEM in education, there is no better time to combine art and science in creative ways like these to “fan the flame” of their natural curiosity. STEAM adds the ART to STEM and stands for science, technology, engineering, art and Mathematics. The goal of integrating STEAM practices into the classroom is to empower students to be problem-solvers and innovators, unafraid of failure and committed to figuring out open-ended challenges that mirror real world situations.

Nora probably didn’t think of her artist play date as a STEAM exercise, but she was smiling when she left and beaming with creative confidence in her discoveries and abilities.

As teachers and parents, we know children are born curious and creative, but too often the forced structure of formal schooling erodes their sense of wonder. I hope you consider incorporating more STEAM ideas into your classroom this year, and use them to facilitate wonder, curiosity and creative confidence.

Materials Used:
Clear Shrink-It-Sheets – 24 quantity (CSHRINK)

Opaque Shrink-It-Sheets – 24 quantity (SHRINKIE)

Sharpie® Ultra Fine Point Permanent Markers – set of 12 (ULTCLR)
Sharpie® Multi-Colored Permanent Fine-Tip Markers – set of 12 (SHARPCLR)
Colorations® Color Permanent Markers – set of 12 (PERMCLR)

Fun & Friendly Rubber Stamps – set of 25 (ADORABLE)

Twist and Bend Craft Ties Super Pack (TWISTY)

* Brought to you by Discount School Supply®

* For more ideas, visit Art and Creativity in Early Childhood Education


Exciting Colored Craft Tape – Catch the Trend!

AR Washi Tape Lead 
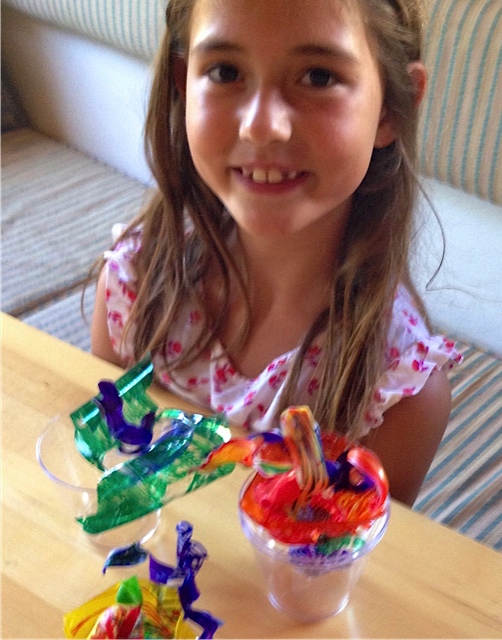
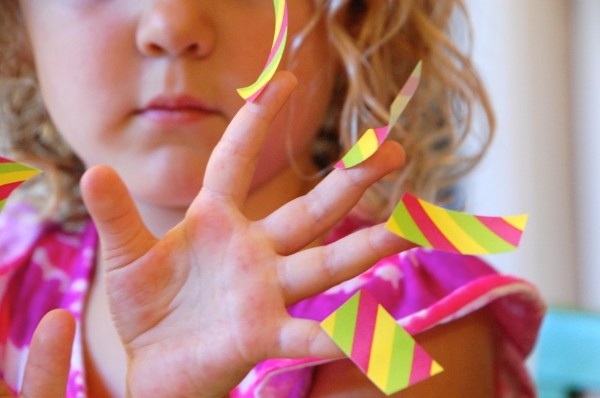
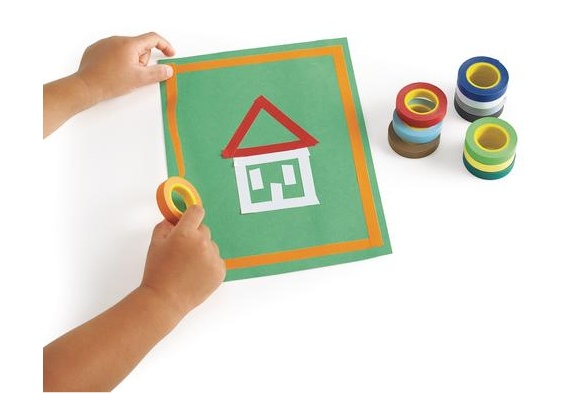
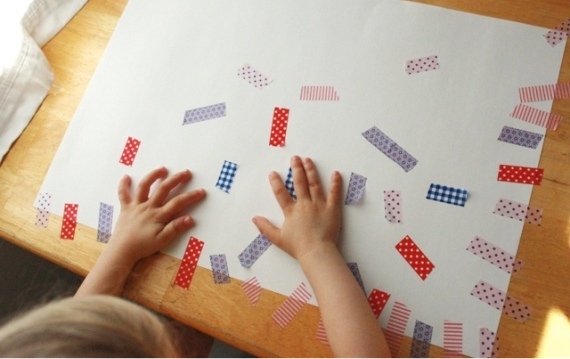
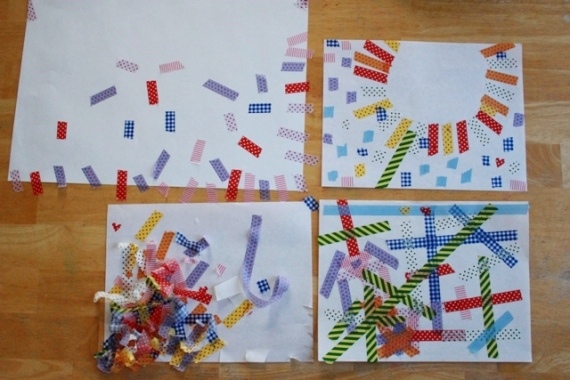
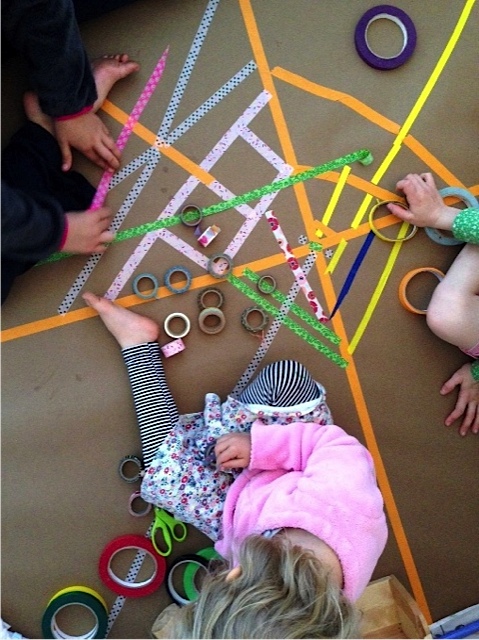
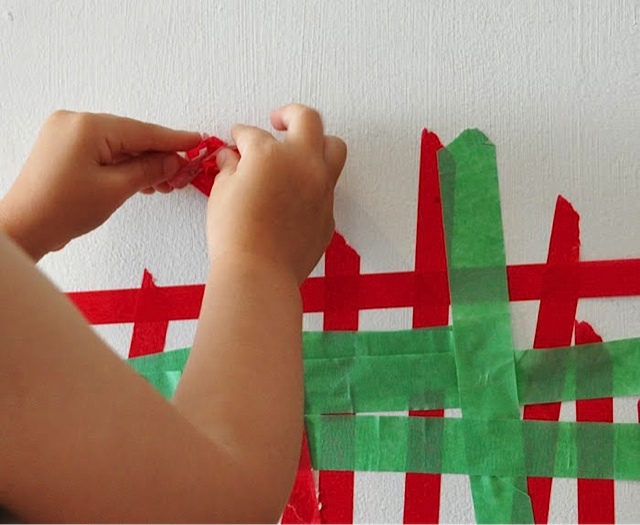
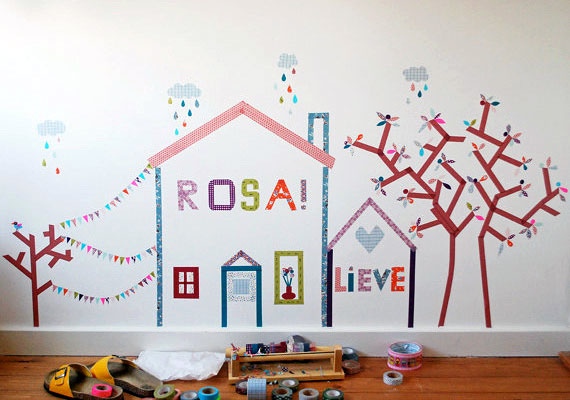
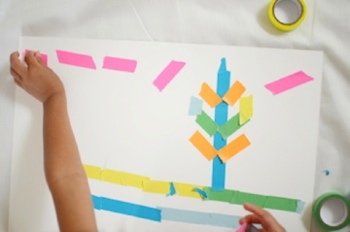
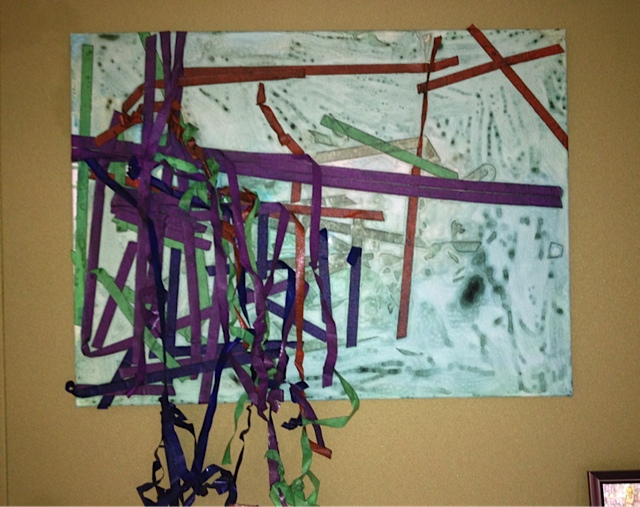
Colored craft tapes are exploding with bright colors, patterns and FUN this year, so it’s the perfect time to discover this newly expanded arts and crafts material. Catch onto this trend, and you’ll be amazed at some of the easy applications you’ll discover. AR Washi Tape 2 Check out these colored tape paintings from Pierce College’s Child Development Center, aren’t they beautiful? As simple paintings they would have looked good – but with the added texture of the craft tapes, they look GREAT and really capture your attention. The addition of colored tape turns a painting into rich media artwork that looks like “gallery art,” but is easy enough for a preschool child to create. Amazing, huh? AR Washi Tape 3 AR Washi Tape 4 AR Washi Tape 5 AR Washi Tape 6 Thin craft tapes like these originated in Japan where they are called “Washi” tape. Washi comes from wa meaning Japanese and shi meaning paper. Here are close-ups of washi-style patterned tapes. Both the bright solids colors and the patterned tapes are easy for young hands to tear and stick down on paper. AR Washi Tape 7 AR Washi Tape 8 Children can design with both solids and patterns on a large piece of butcher paper, placed on the floor. You can also apply tape directly onto the floor or wall since these are “low tack” tapes that do not harm surfaces, and are easy to remove. AR Washi Tape 9 Grown ups will enjoy using craft tapes too! This child’s room wall shows one of the many ways parents and teachers can use colored tapes to create wall décor that is easy to change and adapt over time. AR Washi Tape 10 AR Washi Tape 11 AR Washi Tape 12 But best of all, you don’t have to be a grown up to make colored tape art – from simple to sublime applications. They are so bright and inspiring, people of all ages will want to dive in and discover their own creative ways to play. I’ve been including craft tapes in my conference workshops this year, and teachers quickly fall in love with them. Recently we added them to paper mache tambourines and “secret books” to everyone’s delight. Here’s a great offer on beautifully colored and patterned craft tapes. Try some soon and see what YOU come up with! And check back next month for another special offer on my recommended arts & crafts products from Discount School Supply®!

Receive 15% OFF the below products!

Use code ANNAJULY at checkout.

Offer valid on below products only. Offer expires 8/31/14.

Material’s Used: Glittery Craft Tape – Set of 10 (SNAZZY) Printed Craft Tape – Set of 10 (PRINTED) Fabulous Printed Craft Tape – Set of 15 (FABULOUS) Craft Tape Super Pack – Set of 20 (VIVID) * Brought to you by Discount School Supply® * For more ideas, visit Art and Creativity in Early Childhood Education

Focus on the Elements of Art: Line

Anna Elements of Art Line 1

Line is one of the essential “Elements of Art,” and one of every child’s first art experiences. Line precedes all other elements of art. If art is a child’s first language, then line is where the child’s self expression begins.

Anna Elements of Art Line 2

What does it mean to focus on LINE? It means breaking down the elements of art into their components, expressing those components individually, and then naming them so they become part of your verbal and visual vocabulary.

Anna Elements of Art Line 3

Anna Elements of Art Line 4

Anna Elements of Art Line 5

As we provide art experiences for children, we often forgot that breaking down the elements of art into line, shape and color – is a good way to begin. Teachers who like to inspire children with Paintings from the Masters often include the work of Miro, an artist who emphasized LINE in his work.

Anna Elements of Art Line 6 Anna Elements of Art Line 7

But you don’t have to focus on the Masters to emphasize line in your art program.

The Common Core Standards and Pre-K Foundations remind us that LINE and the other elements of art should be an important focus in early childhood education.

Kindergarten Common Core Standards

Visual Art: Analyze Art Elements and Principles of Design

1.3 Identify the elements of art (line, color, shape/form, texture, value, space) in the environment and in works of art, emphasizing line, color, and shape/form.

Pre-K Foundations

Visual Arts, Substrand: Notice, Respond & Engage:

1.1   Communicate about elements appearing in art (such as line, texture, or perspective), and describe how objects are positioned in the artwork.

As you organize your art area and make decisions about what types of materials to provide, keep in mind that line can be explored not just with crayons and markers, but with other exciting materials as well.

Anna Elements of Art Line 8

I love the idea of exploring line with mud painting, shown here from an Outdoor Classroom Conference in Pasadena.Anna Elements of Art Line 9

You can take line into physically active learning by using these new paint rollers, which are also good with clay. Paint rollers let children explore line while engaging both sides of their brains in expansive large muscle movements and “crossing the midline.”

Anna Elements of Art Line 10

Here’s a video clip of Marble Magnet Painting, a fun science-oriented exploration of line art. The second photo shows the same painting turned into a monoprint.Anna Elements of Art Line 11

Anna Elements of Art Line 12

The new colored tapes are easy for young fingers to tear and are perfect for exploring the quality of line.Anna Elements of Art Line 13

Anna Elements of Art Line 14

Nature oriented art often includes branches as line. Here Master Teacher Kathy Walker shows off one of her student’s nature mobiles.Anna Elements of Art Line 15

Anna Elements of Art Line 16 Anna Elements of Art Line 17

Pipe cleaners are bendable lines that can be combined with other materials in 3-D art.

Anna Elements of Art Line 18 Anna Elements of Art Line 19

Not to be missed are the new (and fabulously inexpensive) Twisty Ties, or Twist and Bend Craft Ties Super Pack (TWISTY). They are shown here wrapped around paintbrush handles, and then combined with Colorations® Super Lightweight Air Dry Putty (CPUTTY).

Anna Elements of Art Line 20 Anna Elements of Art Line 21

Last but not least, don’t forget the art of scribbling, which we did at the BAEYC Conference (and many other conferences this year) – reminding us that scribbling with crayons is fun for children and adults alike.

Written language and art…..it all begins with a line. So go find new ways to look at lines and offer children a wide variety of materials to express themselves through line.

Go for a walk and look for cracks in the sidewalk, flower stalks, telephone poles, and other lines in your environment. And as you do, think of the amusing words of the famous artist Paul Klee – “A line is a dot out for a walk.”

Materials Used:
Colorations® Super Lightweight Air-Dry Putty – Colored (CPUTTY)
Twist and Bend Craft Ties Super Pack (TWISTY)

My Love Affair with Colorations®

AR Colorations Love Affair 1

I love to sing praises for Colorations® art materials, how can you NOT love a brand with that name? There’s always something new, sparkly or magical coming down the pike.  So I say, who needs the high-priced brand, when Colorations® is less expensive and of better quality. Do you feel the same?

When the new year rolls around, it’s fun to see what’s NEW in Colorations® art. Have you taken time to experiment with something new lately? If not, why not try something NEW each time you re-stock.  If you “change up” your list of art supplies and new things here and there, you’ll help S-T-R-E-T-C-H young minds and imaginations.  It’s true!  Creativity thrives on new input, and new materials provide unique challenges and discoveries.

AR Colorations Love Affair 2

This weekend I experimented with three Colorations® dough products to compare and contrast their properties. It felt like a science experiment as I immersed myself in exploration and documented my results.

AR Colorations Love Affair 3

I was eager to try a brand new product: Colorations® Amazing Air-Dry Modeling Foam.  Why was it called foam and not dough? How was it different from Colorations® IncredibleFoam® Dough or Air Dry Putty? How could I use it to raise my Ecers scores for 3-D art? Given fifteen minutes to play with it, here’s what I found out:

The colors are bright and inviting. The small air-tight containers are practical and re-usable. The price is right at $14.99 for a set of 12 colors. After digging in, I realized immediately that it’s way denser than other manipulatives. It offers  a completely different tactile experience than play dough or homemade putties. Children will enjoy the simple process of rolling and pounding it. You can use it with the same clay tools you have on hand. I took the green and made a simple pinch-pot to test the material’s stretch-ability. It’s pretty amazing  – unlike any art material I had ever played with.

On a therapeutic note: Because Colorations® Amazing Air-Dry Modeling Foam is dense, it would serve as a great tool for helping children channel stress and calm themselves down if they’re feeling angry or fidgety. In other words, modeling foam will provide a physical release for tension much like the resistant putties that occupational therapists use. It will also help develop muscle strength in hands and fingers, which is excellent preparation for early handwriting skills.

AR Colorations Love Affair 3.5

Look at how the dense quality allows it to stand up tall and keep its shape. Here I rolled out the blue, took a potato press to the pink, and simply squeezed the orange in my fingers. They held together when I pressed them, but if I was going to keep this I would add a little white glue to hold it together. If I didn’t want to keep it, I would put it back in the plastic air-tight containers, for re-use another day.

As first this product looks a lot like Colorations® IncredibleFoam® Dough, but it has a much finer grain, so it holds a shape more easily. It also dries hard and is perfect for 3-D art (required by Ecers, remember?). I look forward to seeing children use it in large recycled 3-D art, by molding and gluing it onto cardboard boxes, wooden blocks, plastic bottles and other recyclables.

AR Colorations Love Affair 4

Here you see how another green bowl made from Colorations® IncredibleFoam® Dough compares.  IncredibleFoam® has much larger grains, so it makes a rougher bowl shape. While the Air-Dry Modeling Foam dries overnight, the IncredibleFoam® never dries. Both art products are fun to play with and can be completely child-directed.

AR Colorations Love Affair 5

My favorite Colorations® dough is Colorations® Super Lightweight Air-Dry Putty.  I love the white version since you can paint white air-dry putty with any water-based paint or marker, and therefore personalize it completely.  But lately I’ve been working with the colored version of air-dry putty, which works beautifully with the new dough pattern plates. In fact, pattern plates and air-dry putty were born to go together.

AR Colorations Love Affair 6 AR Colorations Love Affair 7 AR Colorations Love Affair 8

Air-dry putty is extremely fine-grained, so it picks up incredible details when imprinted with clay tools or pressed onto these patterned dough plates. These pattern plates will make all your play dough and clay experiments more fun, too.

AR Colorations Love Affair 9

Next I brought out a pack of new In the Garden Plastic Beads. These brightly colored beads were much smaller than I expected, but they were full of delightful little colored leaves. I was worried that no small child could string these beads because the holes are small, but they all fit perfectly onto Colorations® black elastic cord. I think they’d be fine for four- and five-year-old children to string.  Plus they make great glue-down collage materials for the younger set and you get 800 beads in a pound, so this is a good budget-stretcher that ties in with nature themes.

AR Colorations Love Affair 10 AR Colorations Love Affair 11

In the Garden Beads are very dimensional and make interesting stamped patterns on the air-dry putty.  I used some of the leaf beads as stamps, and then adhered other leaf beads into the putty with a little glue. This is an excellent exercise in fine motor skill development, and the designs will motivate children who are visual thinkers.

AR Colorations Love Affair 12 AR Colorations Love Affair 13

My mind kept going back to recycling, so I found a baby food jar and placed a large ball of putty on the lid as a decoration. Then I glued some more putty around the sides.  I could have continued my discoveries, letting one idea flow into the next, but I was running out of time and the Super Bowl was about to begin.

AR Colorations Love Affair 14

To finish off my experiments, I rolled out all the excess air-dry putty and created a simple Mandala with what I had on the table. When in doubt with what to make, take a paper plate and create a mandala. There’s something about a circular design that’s always satisfying.

Thanks for witnessing my discoveries, and please try some of your own soon.

Materials Used:
Colorations® Super Lightweight Air-Dry Putty –  Colored (CPUTTY)
Colorations® Super Lightweight Air-Dry Putty – White (WPUTTY)

Colorations® IncredibleFoam® Dough (FOAMDO)
Colorations® Amazing Air-Dry Modeling Foam (MODFOAM)
Patterned Dough Plates (DOPLATES)
In the Garden Plastic Beads (NATUREBD)
Black Beading Elastic (BLKELAS)

To celebrate Discount School Supply’s love affair with Colorations®, we are hosting a giveaway on our Facebook page! Beginning the week of February 10, you could win a Stamp Prize Pack, a Craft Prize Pack, a Finger Paint Prize Pack, a Paint Prize Pack or the Grand Prize of a Colorations® Ultimate Liquid Watercolor™ Paint Kit! Head over to our Facebook page to enter to win our drawing! The contest ends on Friday, February 14!