STEM to STEAM: Shrink Art Sculpture, Dale Chihuly Style

Anna Chihuly Shrink Art LeadHow do you encourage and preserve children’s natural creativity and belief in their own capacity?

This week I had an “Artist Play Date” with 7 year old Nora, who taught me the shrink art techniques she learned at summer camp. Nora knows I am a big fan of Shrink-It-Sheets, so she was eager to show me her innovative and truly unique creations.

Anna Chihuly Shrink Art 2Anna Chihuly Shrink Art 3

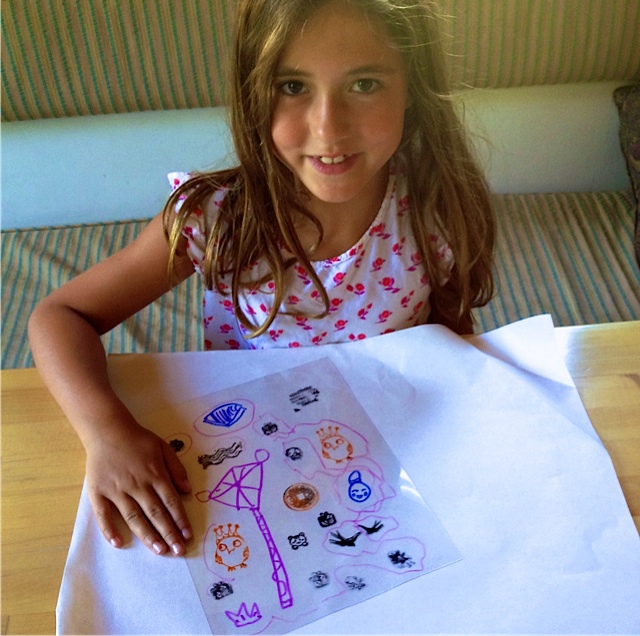
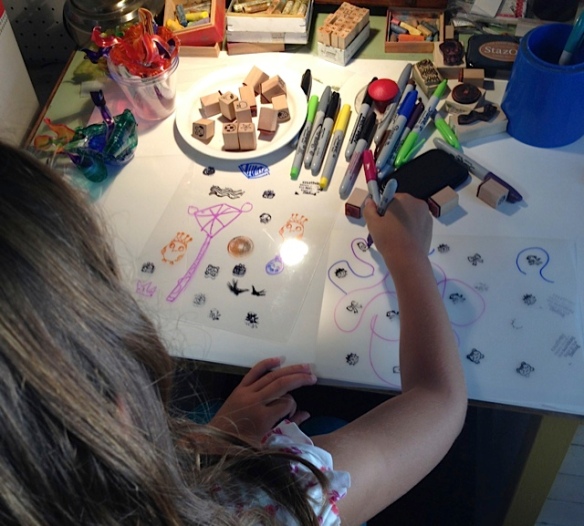
Nora had learned how to use clear shrink art plastic to make 3-D art abstractions in the style of glass sculptor, Dale Chihuly. Here’s Nora in my garage studio with some of the clear shrink-it sheets that she decorated with permanent markers and rubber stamps.

I love the combination of art, math and science that shrink art projects provide. It engages scientific inquiry, physical science and geometry, and includes active explorations of cause and effect, change of state, and mathematical reasoning. Not to mention that it’s colorful, creative and fun.

Anna Chihuly Shrink Art 4Anna Chihuly Shrink Art 5Anna Chihuly Shrink Art 6
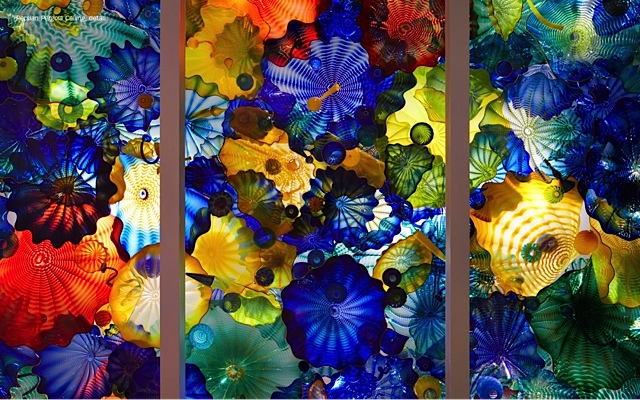
The artist we were emulating is Dale Chihuly, a glass art sculptor known for his stunning and colorful organic shapes. Unlike the majority of glass artists whose work is functional and focuses on vessels and bowls, Chihuly’s glass work is pure abstract art. Children typically relate very well to his use of bright colors and shapes, and can easily be inspired by his style. People traveling to Las Vegas can see this stunning example of his work in the lobby of the Bellagio Hotel.

Anna Chihuly Shrink Art 7Anna Chihuly Shrink Art 8
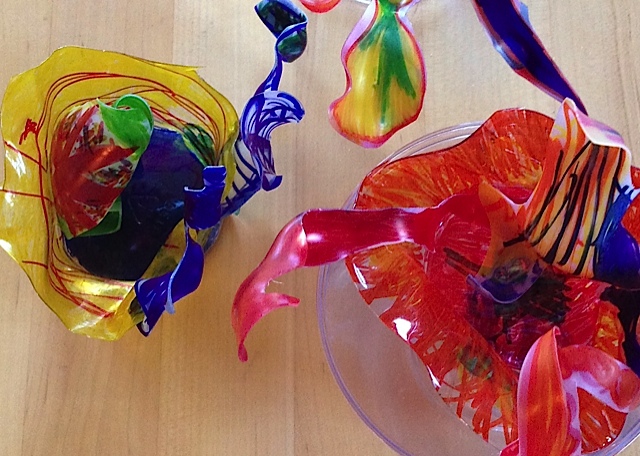
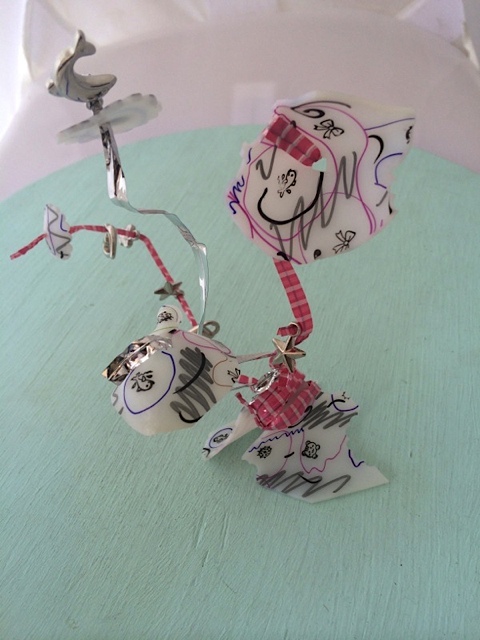
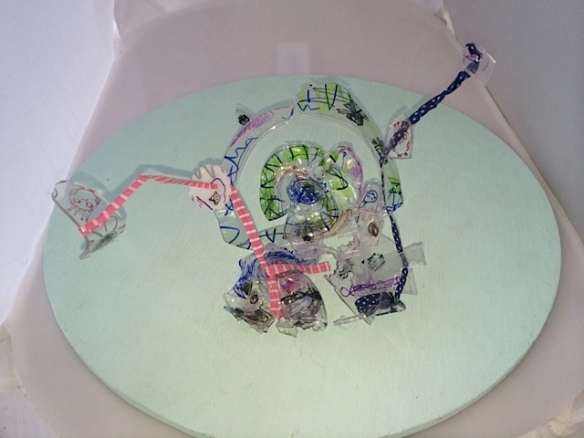
A close look at Nora’s shrink art sculpture shows off the same brilliant colors and organic shapes of Chihuly’s style, and this close up blue “pod” created from opaque shrink art plastic also reveals rich semi-transparent colors.

Anna Chihuly Shrink Art 9Anna Chihuly Shrink Art 10

Here’s another example of opaque Shrink It Sheet cutouts, which we decorated with markers and rubber stamp impressions. They’re shown here in the oven, where we baked them for 3 minutes at 310 degrees. When they came out, Nora attached them together into this small sculpture using Twist and Bend Craft Ties. You can also a hot glue gun to attach baked pieces together, but twist ties add color and eliminate the stress of using hot glue.

Anna Chihuly Shrink Art 11Anna Chihuly Shrink Art 12
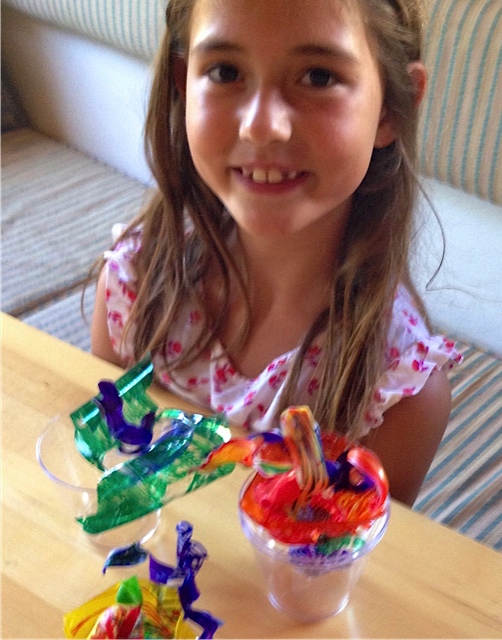
While the oven was warm, we also experimented with permanent markers and stamps on plastic cups. Here are the cups before and after baking. Again, Nora used Twist and Bend Craft Ties to connect baked parts together into one composition.

Just like with the Shrink-It-Sheets, we baked the colored plastic cups for 3 minutes in a 310-degree oven. Various brands of plastic cups have different properties, and oven temperatures also vary, so this part calls for experimentation (aka the scientific method at work). You can use a toaster oven in the classroom too, just keep the windows open for ventilation. It’s so dramatic to see how oven heat distorts, shrinks and flattens various thin plastics, causing designs to shrink and colors to intensify.

Anna Chihuly Shrink Art 13

Thanks, Nora! I learned a lot from you and admire your curiosity. And while I’m kind of sad that summer break is coming to an end, I know a new school year of growth and discovery lies ahead for YOU and other children nationwide.

With the nationwide emphasis on STEM in education, there is no better time to combine art and science in creative ways like these to “fan the flame” of their natural curiosity. STEAM adds the ART to STEM and stands for science, technology, engineering, art and Mathematics. The goal of integrating STEAM practices into the classroom is to empower students to be problem-solvers and innovators, unafraid of failure and committed to figuring out open-ended challenges that mirror real world situations.

Nora probably didn’t think of her artist play date as a STEAM exercise, but she was smiling when she left and beaming with creative confidence in her discoveries and abilities.

As teachers and parents, we know children are born curious and creative, but too often the forced structure of formal schooling erodes their sense of wonder. I hope you consider incorporating more STEAM ideas into your classroom this year, and use them to facilitate wonder, curiosity and creative confidence.

Materials Used:
Clear Shrink-It-Sheets – 24 quantity (CSHRINK)

Opaque Shrink-It-Sheets – 24 quantity (SHRINKIE)

Sharpie® Ultra Fine Point Permanent Markers – set of 12 (ULTCLR)
Sharpie® Multi-Colored Permanent Fine-Tip Markers – set of 12 (SHARPCLR)
Colorations® Color Permanent Markers – set of 12 (PERMCLR)

Fun & Friendly Rubber Stamps – set of 25 (ADORABLE)

Twist and Bend Craft Ties Super Pack (TWISTY)

* Brought to you by Discount School Supply®

* For more ideas, visit Art and Creativity in Early Childhood Education


Exciting Colored Craft Tape – Catch the Trend!

AR Washi Tape Lead 
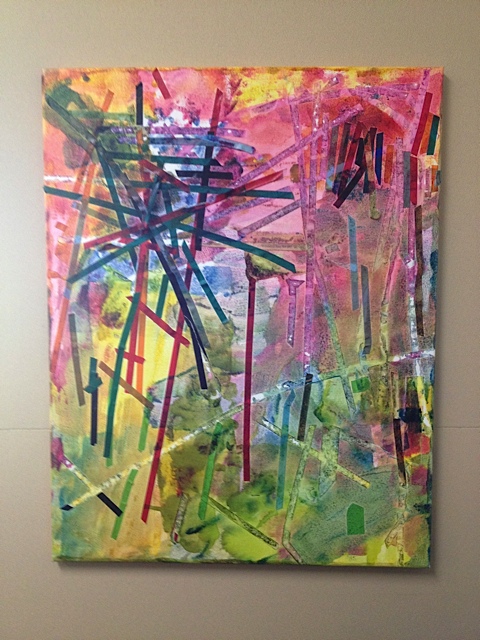
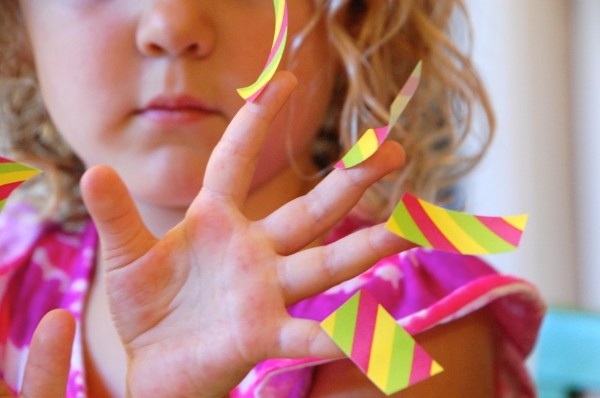
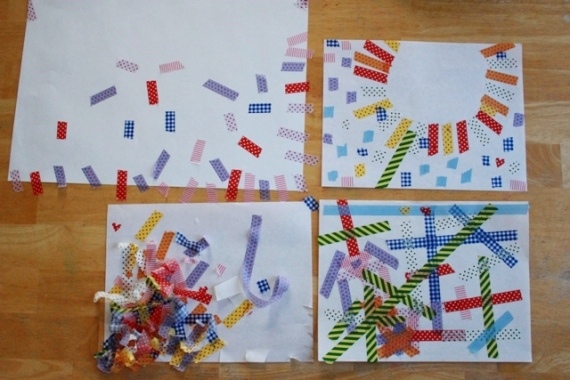
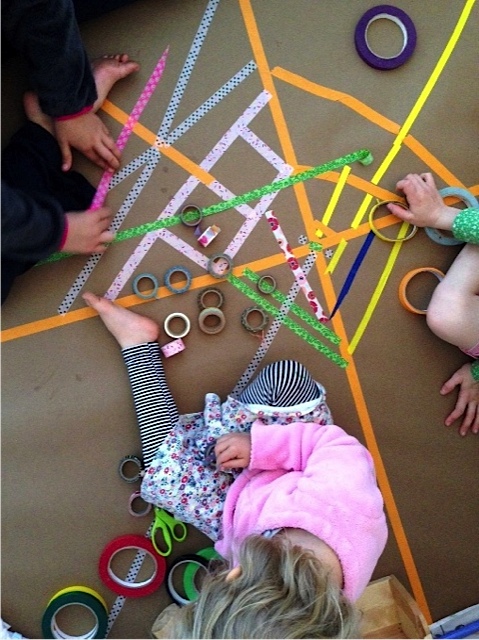
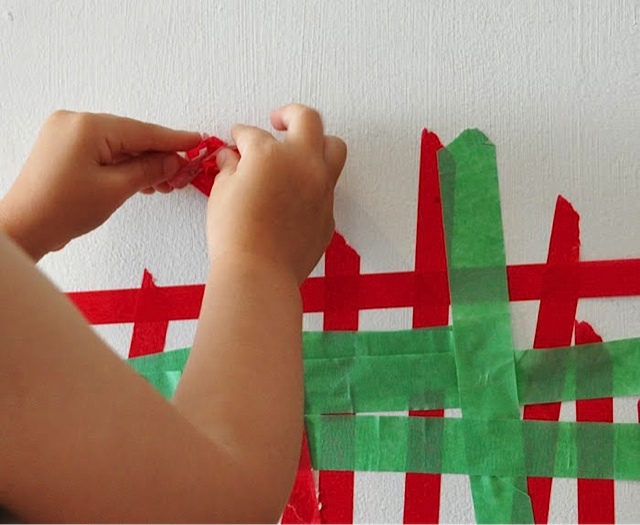
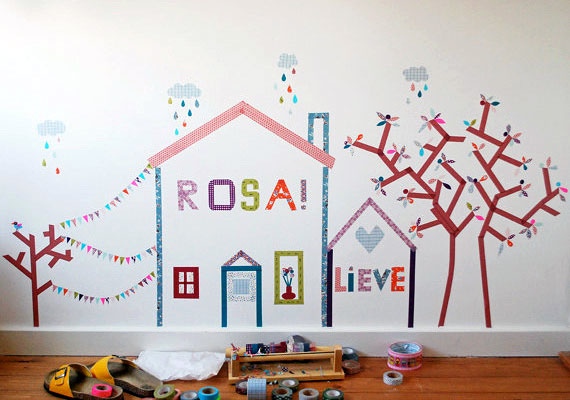
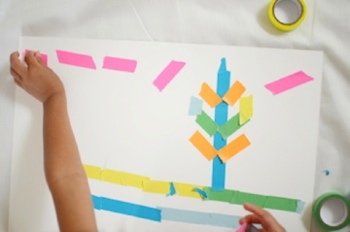
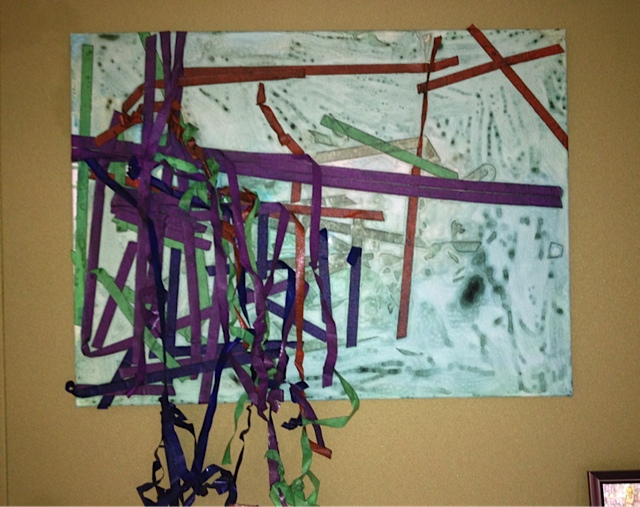
Colored craft tapes are exploding with bright colors, patterns and FUN this year, so it’s the perfect time to discover this newly expanded arts and crafts material. Catch onto this trend, and you’ll be amazed at some of the easy applications you’ll discover. AR Washi Tape 2 Check out these colored tape paintings from Pierce College’s Child Development Center, aren’t they beautiful? As simple paintings they would have looked good – but with the added texture of the craft tapes, they look GREAT and really capture your attention. The addition of colored tape turns a painting into rich media artwork that looks like “gallery art,” but is easy enough for a preschool child to create. Amazing, huh? AR Washi Tape 3 AR Washi Tape 4 AR Washi Tape 5 AR Washi Tape 6 Thin craft tapes like these originated in Japan where they are called “Washi” tape. Washi comes from wa meaning Japanese and shi meaning paper. Here are close-ups of washi-style patterned tapes. Both the bright solids colors and the patterned tapes are easy for young hands to tear and stick down on paper. AR Washi Tape 7 AR Washi Tape 8 Children can design with both solids and patterns on a large piece of butcher paper, placed on the floor. You can also apply tape directly onto the floor or wall since these are “low tack” tapes that do not harm surfaces, and are easy to remove. AR Washi Tape 9 Grown ups will enjoy using craft tapes too! This child’s room wall shows one of the many ways parents and teachers can use colored tapes to create wall décor that is easy to change and adapt over time. AR Washi Tape 10 AR Washi Tape 11 AR Washi Tape 12 But best of all, you don’t have to be a grown up to make colored tape art – from simple to sublime applications. They are so bright and inspiring, people of all ages will want to dive in and discover their own creative ways to play. I’ve been including craft tapes in my conference workshops this year, and teachers quickly fall in love with them. Recently we added them to paper mache tambourines and “secret books” to everyone’s delight. Here’s a great offer on beautifully colored and patterned craft tapes. Try some soon and see what YOU come up with! And check back next month for another special offer on my recommended arts & crafts products from Discount School Supply®!

Receive 15% OFF the below products!

Use code ANNAJULY at checkout.

Offer valid on below products only. Offer expires 8/31/14.

Material’s Used: Glittery Craft Tape – Set of 10 (SNAZZY) Printed Craft Tape – Set of 10 (PRINTED) Fabulous Printed Craft Tape – Set of 15 (FABULOUS) Craft Tape Super Pack – Set of 20 (VIVID) * Brought to you by Discount School Supply® * For more ideas, visit Art and Creativity in Early Childhood Education

Group Art Activity: Tennis Ball Painting!

anna tennis ball painting 1Summer is almost over and here in Los Angeles school has already started. But for many children, there’s still a final stretch of summer freedom and the joys of outdoor play.

anna tennis ball painting 2

Here’s a creative group art idea from Danielle Monroy, who own and operates Creative Care for Children in Santa Barbara.

Let Danielle’s children inspire you to take advantage of the final stretches of summer weather with messy art in the great outdoors.

anna tennis ball painting 3

anna tennis ball painting 4

Ingredients:
1 small plastic pool
Colorations® Simply Washable Tempera, poured into plastic tubs
An equal number of tennis ball
Salad tongs
Cooperative children
Large sheets of white paper

Stir together and serve with a smile!

Reports Danielle: Some of the great things about this project? It was a truly cooperative activity – it only works when everyone works together and the more they do, the more giggles are produced!

During outdoor play sometimes children need more large motor play. This is a wonderful large motor activity that includes art, collaboration and concentration!

anna tennis ball painting 5

anna tennis ball painting 6

Danielle and I will be co-presenting on Science and Sensory Play at the CAEYC conference in April 2014. We’re calling it STEM to STEAM – combining art and science in the early childhood classroom. We’ll post new handouts on that topic on the blog here, so you can also try them out. Stay tuned, and thanks for checking in!    It’s a pleasure staying connected with people like you who actively explore new ideas and embrace their own creativity.

Materials Used:
Colorations® Simply Washable Paint – set of 11 (SWT16)
Butcher Paper Rolls (P4018)
Sand & Water Activity Tubs – set of 4 (TUBS)

* Brought to you by Discount School  Supply®

Finger Weaving for Fun and Math

anna finger weaving 1

I just came back from our annual sales meeting where we got to play with all our new products. The creative talents of our product development staff continue to amaze me, and I’m happy to say after 15 years of working for Discount School Supply®, I still love my job. And why not? I get to share creative ideas with people like you, and know that I’m helping make a difference in the lives of children.

Let’s talk a walk down “memory lane” and recall the simple woven “pot holders” that many of us made as children. Do you recognize them pictured here?

anna finger weaving 2

It’s a new product in our Arts & Crafts, and it brought back many childhood memories.  When I was in early Elementary School, I was obsessed with making pot holders in every color imaginable. Did you make them too? If not, it’s never too late to start this simple and affordable weaving process, typically for children ages five and up. Not only is it fun, it’s a great learning tool that exercises pattern-making skills, problem solving, critical thinking and fine motor dexterity.

anna finger weaving 3

anna finger weaving 4

But with summer here, I also recalled how my own two children loved “finger weaving” with just the loops themselves when they were young.  So I grabbed my computer for a refresher course on finger weaving and started making these necklaces and bracelets.  Pretty soon my friends were learning how to finger weave too. It is contagious, calming and creative. For clear instructions on how to finger weave, here’s the perfect resource from the Internet:

anna finger weaving pinterest tutorial

click picture to see the full size

Or, check out this YouTube video for more fun instructions!

Let’s get Practical:

How many bags of loopers would you need for a group of children? Our small group made eight long loop necklaces and a few bracelets with one bag. I’d recommend ordering one bag for every six or eight students, and at $5.99 a bag that is a very good summer deal!

anna finger weaving 5

This is a perfect summer camp and vacation activity because once kids learn how to finger weave, it’s a completely self-directed and loved by boys and girls alike. Pack a bag in the car with you before you go on a family vacation, you’ll be glad you did.

PS – What about math? Loom weaving and finger weaving both exercise fundamental math skills, like these from Teacher Quicksource®.

1. Recognizes Spatial Relationships. The child is able to understand positions and direction, such as right-left, top-bottom, behind-in-front, between, under, over, etc.

2. Classifies and Sorts by Attributes. The child can classify and group objects based on the similarities and differences of the attributes of each object, such as color or size.

3. Creates Patterns by Extending and Comparing. The child can copy, extend or create a pattern, such as colored blocks: black,red, black, red, black ….

4. Understands the Concept of Measurement. The child understands that objects can be measured using height, weight, and capacity

Have a wonderful summer!  Anna

Materials Used:
Loopers – 16 oz Jumbo Bag (LOOPS)
Weaving Loom and Hook (LOOM)

* Brought to you by Discount School  Supply®